
If you have intermediate to advanced programming experience and can install more software locally on your computer, follow these instructions to work with Drupal in Lando. You'll gain more control over the services you need to make your site operate smoothly.
Requirements
- Install Lando
- The official composer template for Drupal
- Composer: Recommended for installing modules. See instructions to install
Steps
- Getting Drupal Core with Composer
- Installing Drupal
- Adding dependencies with Composer
- Running Drush
Getting Drupal Core with Composer
Once Lando has been installed, you should create a folder and run lando init. Then, follow the prompts to enter the required information:
- App's codebase location: current working directory
- Recipe: drupal9
- Webroot location: web (this is the default location for the composer template we will use)
- Name: A good name for your project.
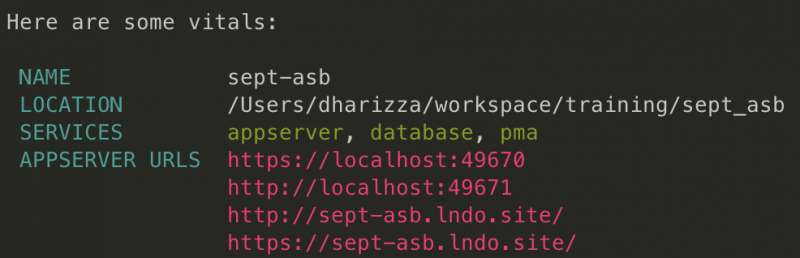
Once finished, there will be a basic .lando.yml file in your folder with your recipe configuration. Then, you should start your project with lando start, keep in mind that this might take several minutes. when the command is finished you'll get some information about your project which includes name, location, services and URLs you can use to access your site:
To create the project we'll use the official composer template for Drupal, it can be found in https://github.com/drupal/recommended-project. To create your project, you should run this command:
lando composer create-project drupal/recommended-project my-project
That command will download Drupal core and dependencies into a my-project subfolder, so you need to move them to the root of your project:
mv my-project/* .
mv my-project/.* .
rmdir my-project
Once that is ready, you should install Drupal, to do so, go to the site URL (when of those displayed at the end of lando start), you will be redirected to the installation page of your new website. If you lost the site URL, you can find it by running lando info and checking the urls section.
Installing Drupal
Choose the language that suits you and, in the next step, pick the 'Standard' profile. Once the system verifies the requirements, you need to set up the database. You can see the database information of your project by running lando info and checking into the section for database services.

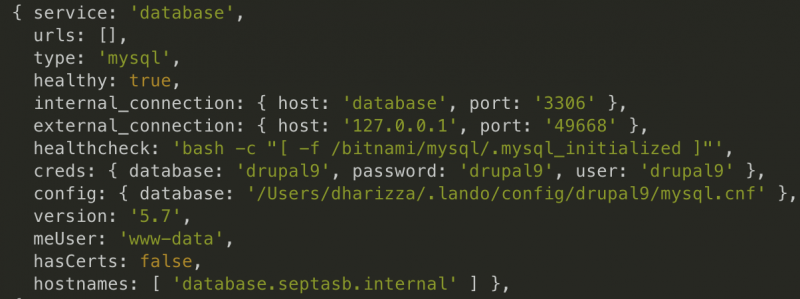
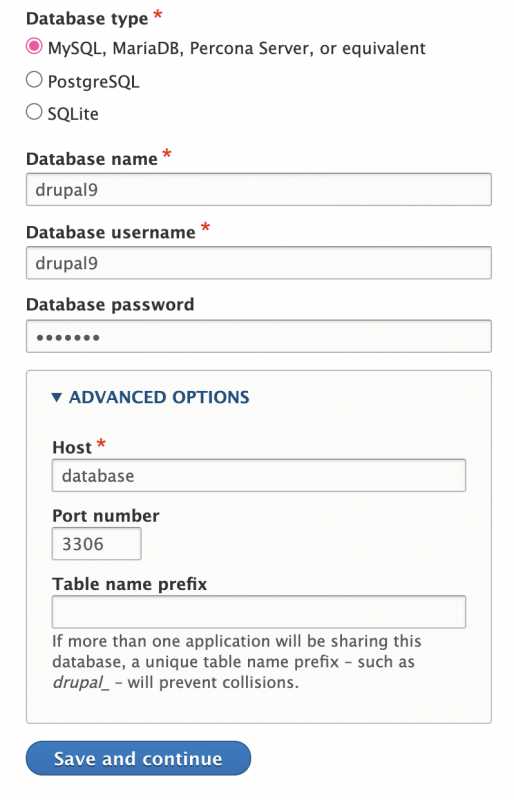
By default with the drupal9 lando recipe, the values for database name, username and password are drupal9. Make sure you also set up the advanced options for host and port number (you can also get this information from the previous command in the internal_connection section). In the following screenshot you can see the default values for each of the fields if you're using the Lando Drupal9 recipe. Fill up the form and then click on Save and continue.
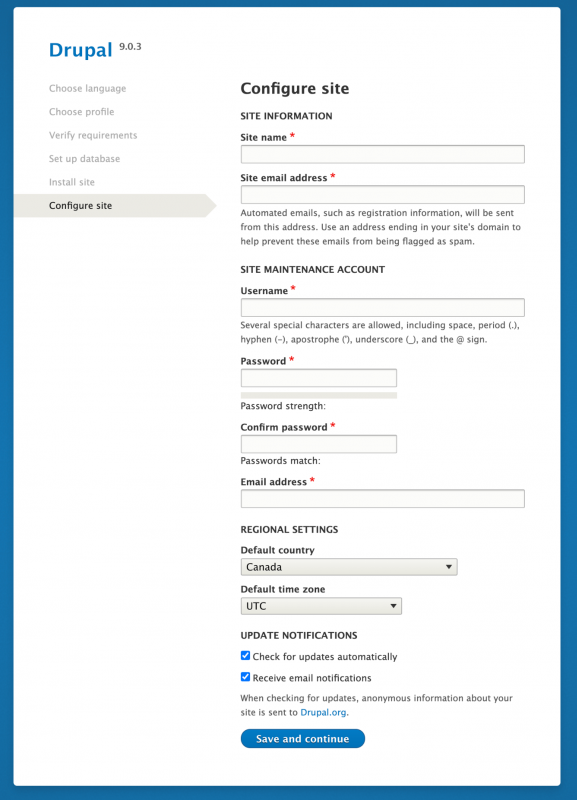
Your site will be set up and in the next screen you'll get a form to configure it with the required information. Don't forget to keep track of the username and password you select, so you can reuse them for the training.
You're done. You created a brand new Drupal website!
Adding dependencies with Composer
In order to facilitate work in this training we'll need to get the following modules:
- Admin Toolbar https://www.drupal.org/project/admin_toolbar
- Devel https://www.drupal.org/project/devel
- Drush https://www.drush.org/latest/
It is good practice to manage Drupal dependencies using Composer instead of manually adding or removing the code, so we'll get them using the following commands:
lando composer require drupal/admin_toolbar drupal/devel drush/drush
Remember every time you need to add a new module, all you need to do is run:
lando composer require drupal/module-name.
If at some point we need to delete some module from the codebase, we'd need to run:
lando composer remove drupal/module-name.
Running Drush
To run drush commands, all you need to do is prepend the word lando to every normal command, for example:
- To install modules:
lando drush en devel admin_toolbar admin_toolbar_tools
- To uninstall modules:
lando drush pmu project_name
- To rebuild drupal caches:
lando drush cr