
Updated on June 15, 2022
This post is based on a talk I gave at DrupalCon Barcelona and this year at MidCamp. You can see a video version of the talk below.
Content is at the core of any successful Drupal project. Before you're working with real content, everything is guesswork: you can't be sure that your content types are configured correctly. At Evolving Web, we integrate content migration into the site building process for most of our projects. This way, we can populate a website with real content quickly and efficiently, to get the client involved early on in creating content for the site. We can also fix issues with content structure and identify missing content well in advance of site launch.
There's are many ways to get content into Drupal:
- Hire a team of students or interns
- Use the Feeds module
- Write a custom script, or
- Create a migration with the Migrate module
Migrate is a tool for getting your data from a source (CSV, JSON file, another Drupal site, a third-party database) into Drupal. This tutorial provides an overview of how to create the most basic migration from a CSV file to a Drupal website. While the code is Drupal-specific, the concepts and advice about preparing and testing content could be applicable to any content migration
Let's say you're creating a university website and you need to migrate a set of program data into Drupal. You start by creating a spreadsheet (or asking your client to prepare of spreadsheet) of programs. Then, you create a program content type and write an import the data into Drupal. Here are the steps you might take to make that happen:
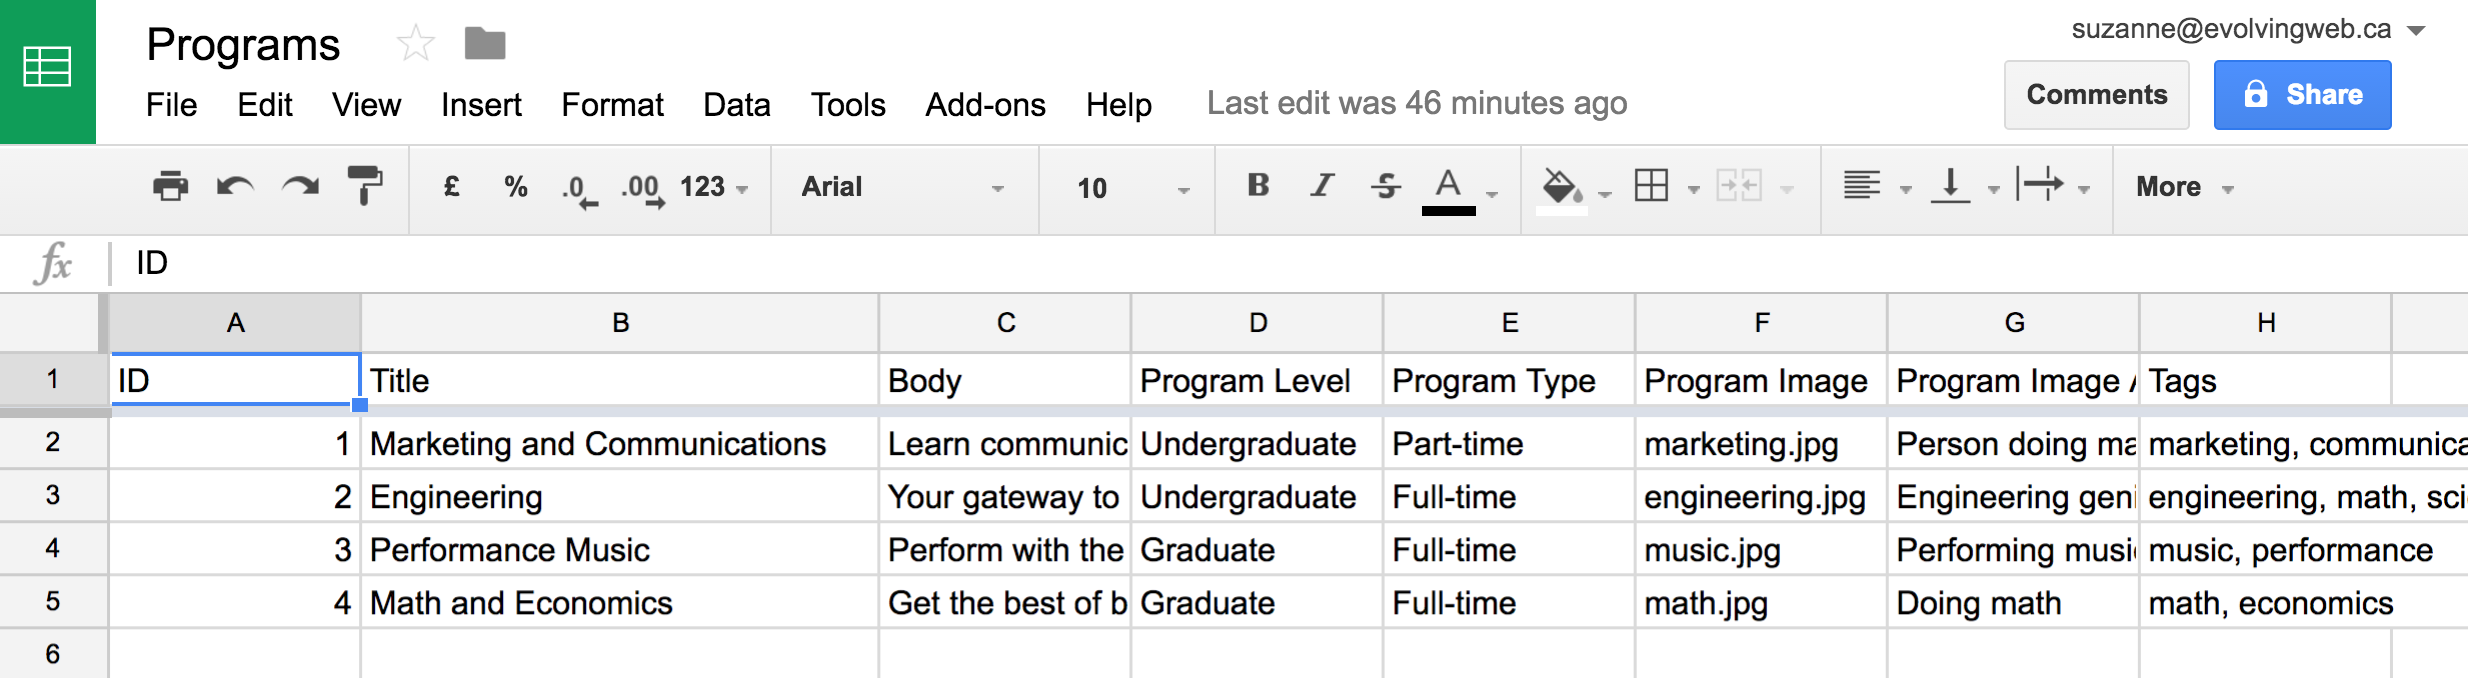
1. Create the CSV
- Provide the content creators with a sample spreadsheet to start with based on your conception of the content and the design/wireframes.
- Add a column for each field value (e.g. the program description) or field attribute (e.g. image alt text).
- Have your client create a small set of content (maybe 3-5 representative programs).
- Give your client feedback on the CSV and write your migration based on this small set of data before asking for the complete data.
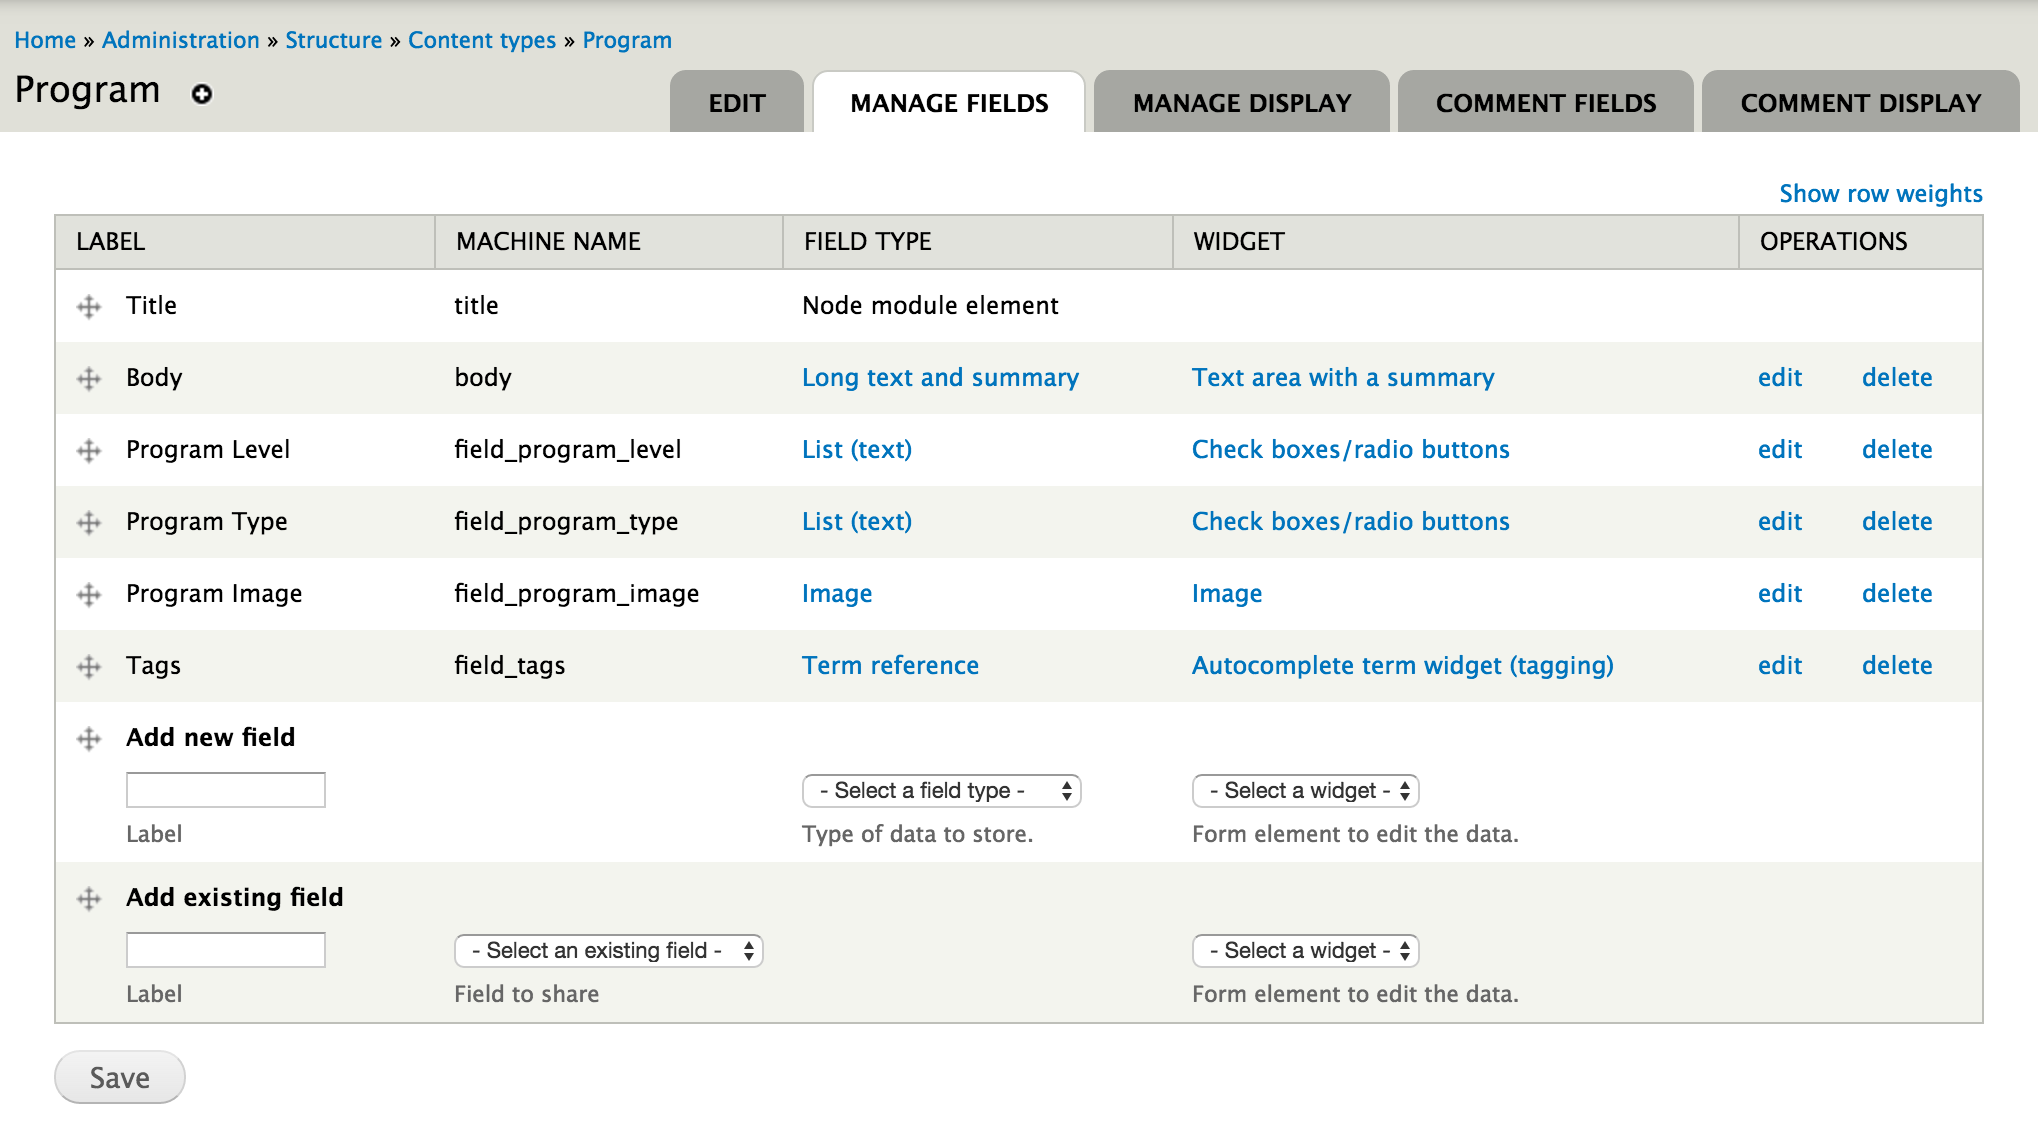
2. Create the Content Type
Next, it's time to set up our content type. We need to create a content type that matches the data in our CSV file. Some things to keep in mind when creating your content type:
- If you have more than one value in your content, create a multi-value field.
- If the field has more than one part (e.g. an image with an alt text, a link with a URL and a title), make sure that this lines up with your configuration.
- If you're creating a List text field, make sure the keys match what the client has entered in the spreadsheet (otherwise, you'll have to transform the values in the spreadsheet in the prepareRow function in your migration).
3. Create the Migration
Now that we have the CSV and the content type, we can create the migration.
To create a migration, you need to create a simple module that extends the migrate module (so make sure migrate is enabled on your site).
Beyond your standard .info file, some code in the .module file that tells Drupal that you want to create a migration (or several migrations), the main chunk of code you'll nee to write is the migration itself. In my sample module, I put this code into a separate migrate_programs.migrate.inc file. You can find the example module in its entirety here.
First, we create a MigratePrograms class (this has to match the name we gave our migration in our .module file). Then, we describe our migration and indicate a unique identifier for our content.
class MigratePrograms extends Migration {
  public function __construct($arguments) {
    parent::__construct($arguments);
    $this->description = t('Import programs from a source CSV file.');
    // Tell migrate how to identify the content.
    // We need to tell migrate about the numeric index of each field:
    $this->map = new MigrateSQLMap(
    $this->machineName,
      array(
        'id' => array(
          'type' => 'int',
          'not null' => TRUE,
        ),
      ),
      MigrateDestinationNode::getKeySchema()
    );
Secondly, we tell the migration the destination where our content is going. In this case, it's our program content type.
 // Tell migrate about the destination.
    $this->destination = new MigrateDestinationNode(
      'program',
      MigrateDestinationNode::options('und', 'full_html')
    );
Then, we tell Migrate the source of our migration. Because we're using a CSV file, we identify all the columns of the CSV that we want to migrate into Drupal. Then, we tell the migration where our source CSV lives.
    // Tell migrate about the source.
    $csvcolumns = array(
      0 => array('id', 'ID'),
      1 => array('title', 'Title'),
      2 => array('body', 'Body'),
      3 => array('program_level', 'Program Level'),
      4 => array('program_type', 'Program Type'),
      5 => array('program_image', 'Program Image'),
      6 => array('program_image_alt', 'Program Image Alt'),
      7 => array('tags', 'Tags'),
    );
    $this->source = new MigrateSourceCSV(
      drupal_get_path('module', 'migrate_programs') . '/programs.csv',
      $csvcolumns,
      array('header_rows' => 1)
    );
Finally, we map the destination fields (using the Drupal machine names) to the source (using the identifiers we set up).
    // Map the destination field to the source column.
    $this->addFieldMapping('title', 'title');
    $this->addFieldMapping('body', 'body');
    $this->addFieldMapping('uid')->defaultValue('1');
    $this->addFieldMapping('field_program_level', 'program_level');
    $this->addFieldMapping('field_program_type', 'program_type');
    $this->addFieldMapping('field_program_image', 'program_image');
    $this->addFieldMapping('field_program_image:source_dir')
      ->defaultValue(drupal_get_path('module', 'migrate_programs') . '/program-images');
    $this->addFieldMapping('field_program_image:alt', 'program_image_alt');
    $this->addFieldMapping('field_tags', 'tags');
    $this->addFieldMapping('field_tags:create_term')
      ->defaultValue(TRUE);
    $this->addFieldMapping('field_tags:ignore_case')
     ->defaultValue(TRUE);
  }
Finally, we use a function called prepareRow to break up our comma-separated tags and program type fields into arrays.
  // Break up our comma-separated tags and program types into arrays. These are
  // our multi-valued fields.
  public function prepareRow($row) {
    $row->tags = explode(',', $row->tags);
    $row->program_type = explode(',', $row->program_type);
  }
}
4. Run the Migration
Finally, we can run the migration to import the content. You can go to Content > Migrate to run the migrations using the UI. Or, you can use these handy drush migrate commands, such as:
drush migrate-register programs
drush migrate-import programs
drush migrate-import programs --update
drush migrate-rollback programs
drush migrate-stop programs
drush migrate-analyze programs
drush migrate-deregister programs
5. Test and Iterate
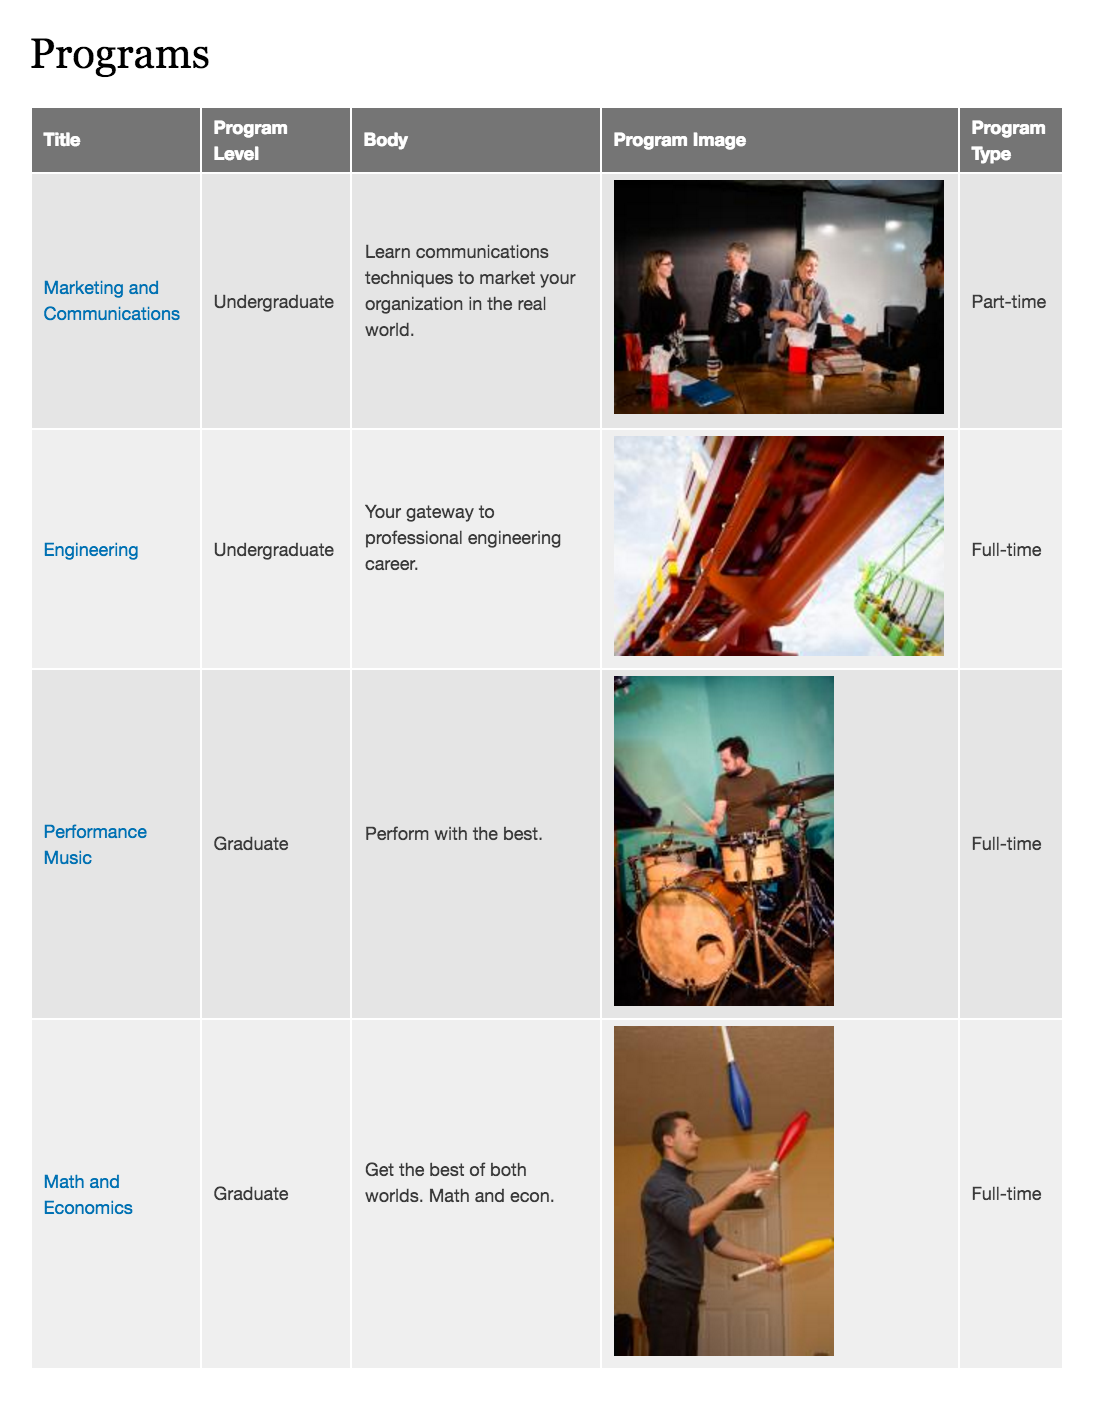
After running the migrations, it's important to test the content. Some suggestions on testing your content:
- Use Views to create a table of content to test the results.
- Test a random sampling of content.
- Rollback the migrations and try again, when you find issues with the content or migration code.
When you're looking at the test content, some things to check for:
- Missing fields that are required
- Images that are the wrong size
- Values for select fields that don’t match allowed values
- Text that is too long or too short for the design
- Duplicate titles that make finding content difficult
- Missing data because the ‘unique ID’ is not unique
Resources
You can download the example migration code and the export of the program content type (use the Bundle Copy module to import this into your site). For more advanced examples, check out the example migrations that come with the migrate module.